You’ve booked the yurt, the safari tent or the pod — and then a practical question hits: what exactly will you be cooking on? Some glamping sites hand you a firepit at your pitch, others provide a BBQ, and many rely on a shared kitchen tent with a couple of burners. The glamping cooking facilities on offer vary enormously from site to site, and even between unit types at the same site.
That matters, because what you pack depends entirely on the answer. Cast iron and long matches are useless if you’ve actually got a two-burner stove, and a suitcase full of fresh ingredients won’t help if there’s no fridge. This guide walks through the main types of setup you’ll encounter, how firepit cooking really works and when it’s allowed, what to expect from BBQs and communal kitchen tents, the questions to ask before you book, and how to plan meals and packing around whatever cooking arrangement your trip includes.
Types of Glamping Cooking Facilities
Most glamping sites fall somewhere on a spectrum from bare-bones outdoor cooking to something close to a self-catering cottage. Knowing which end your booking sits on changes everything, from the cookware you pack to the meals you can realistically plan. A site that looks idyllic in photos can turn frustrating if you arrive expecting a hob and find only a grate over embers. The four setups below cover the vast majority of what you’ll encounter, and each one suits a slightly different style of trip.
- Firepits: an open wood fire set directly at your pitch, usually a metal grate or bowl. They shine for grilling sausages, toasting bread and simmering one-pot meals, but they depend entirely on dry weather and local fire rules, so treat them as a fair-weather option.
- BBQs: charcoal or gas grills either provided at your unit as standard or bookable as an extra for your stay. These are often the most reliable flame-cooking choice, because they’re typically permitted even when open wood fires are restricted in dry conditions.
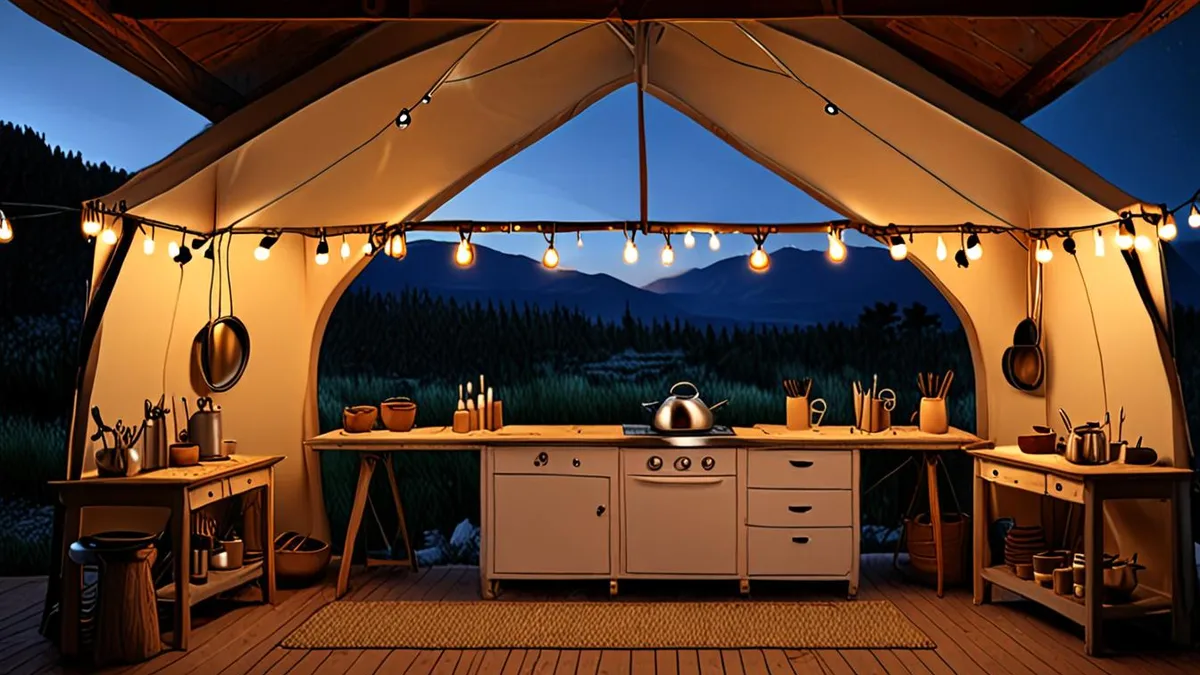
- Kitchen tents: covered communal shelters shared between pitches, generally fitted with a stove, sink and shared cookware. You get shelter from rain and a proper work surface, but you’ll be sharing the space with other guests, especially at busy times.
- Full kitchens: indoor or covered private kitchens with more complete equipment, found mainly at higher-end sites. This comfort comes at a price — sites offering them usually charge a noticeable premium over comparable sites without them, so weigh it against how much you actually plan to cook.
Some larger sites offer a mix, for example a firepit at each tent plus one central kitchen tent for rainy days. Others keep things simple with a single setup across the whole site. Always check which arrangement applies to your specific unit rather than the site as a whole, and ask about equipment before you pack.
Firepit Cooking: What Works and When
Nothing beats cooking over a real wood fire, and firepits are at their best from roughly May to September, when the ground is dry and the wood actually lights. Shoulder months can work too — if you’re flexible about dates, glamping in the shoulder season can be a smart choice, with quieter pitches and fewer fire restrictions once the summer risk has passed.
Fire bans are the big variable
Expect fire bans or restrictions in July and August, especially in southern Europe, where dry summers push many sites to prohibit open flames altogether. Some sites switch to BBQ-only cooking during these periods; others may suspend all flame cooking temporarily. Check the fire-risk rules for your exact travel dates before you book if cooking over flame is a priority.
Equipment and firewood</h3
Cookware matters more than most people expect. Cast iron pans and foil packets handle open flames and uneven heat far better than delicate non-stick pans or thin pots, which can scorch or warp. Keep the menu simple: skewers, grilled vegetables and one-pot stews all work well over glowing embers rather than high flames.
Finally, ask how firewood is handled. Some sites supply it free, some sell bundles on site, and some expect you to bring your own — which isn’t always practical if you’re arriving by plane or train. Confirming this in advance saves a frustrating first evening.
BBQs at Glamping Sites
When open fires are off the menu, BBQs usually keep going. Charcoal and gas BBQs are typically permitted even when open wood fires are banned in dry spells, because they’re considered lower risk. That makes them the dependable choice for midsummer trips to fire-prone regions — you still get flame-cooked food without falling foul of the rules. Check your specific dates and destination before assuming anything, as local restrictions can shift with the weather.
The practical detail is access. A BBQ might be fixed at your pitch, shared between several units, or a rentable extra you book in advance. Each arrangement changes how you plan meals, so it’s worth clarifying exactly what your booking includes before you arrive. Some sites also have covered cooking areas near the grill, which makes a real difference if you’re cooking in the rain.
- Rental costs: if the BBQ isn’t included, a rented BBQ and basic kit typically adds €10-30 per stay — modest, but worth factoring into your budget alongside the nightly rate.
- Fuel: don’t assume charcoal is waiting for you. Bring your own if you’re driving, or confirm it’s sold on site before arrival so you’re not stuck on your first night.
- Shared grills: if the BBQ is communal, expect queues at peak dinner time and give the grill a quick clean before and after use as a courtesy to the next guests.
- Gas vs charcoal: gas lights instantly and heats evenly, which helps on short trips, while charcoal gives better flavor but needs 30-40 minutes to reach cooking temperature.
Whichever setup you end up with, a quick message to the site before booking — is the BBQ at my unit, and is fuel included? — resolves most surprises. It also gives you a sense of how responsive the site is, which tells you a lot about what to expect if anything goes wrong during your stay.
Kitchen Tents and Communal Cooking
Many glamping sites, especially those with bell tents and safari tents, skip private cooking facilities altogether and instead offer a shared kitchen tent. These covered communal shelters are usually sized so that one tent serves somewhere between 4 and 10 accommodation units. That works fine in low season, but on a busy August evening you can find yourself queuing for the stove while your pasta water sits unboiled.
The standard setup is fairly predictable: a two-burner stove, a sink with running water, and a set of shared pots, pans and utensils. Larger kitchen tents often add a fridge and a prep counter. It is basic, but genuinely workable if you plan around the shared space rather than treating it like your own kitchen at home.
Shared fridges are where most friction happens. Space is tight, items get moved or borrowed, and things go moldy at the back. A little discipline solves most of it.
- Use hard-sided sealed containers rather than bags, so nothing gets crushed or leaks onto other people’s food.
- Label everything with your name and checkout date, which makes it obvious what can be tossed when you leave.
- Take a quick photo of the fridge contents on arrival so you know what was there before you and can spot space issues early.
- Bring your own dish towel and a small bottle of washing-up liquid, since shared sinks often run short of both.
- Wipe the stove and counter after cooking — in a communal space, the person who leaves it clean sets the tone for everyone else.
Timing matters as much as etiquette. The rush hits between roughly six and eight in the evening, when everyone cooks dinner at once. Cooking mid-morning or earlier in the evening gets you a free stove, a clear fridge and elbow room at the counter. If you must cook at peak time, choose something that needs one pan and minimal attention.
What to Check Before You Book
Cooking facilities vary enormously between glamping sites, and often between units on the same site. A safari tent might come with its own grill, while a bell tent two pitches away relies on a shared shelter down the path. A few pointed questions before you book will save you from arriving with a cool box full of food and nowhere to cook it. It is one of the most common first-time mistakes, and it is easy to avoid with a short email to the site.
- Ask which cooking facility applies to your specific unit type. A site may advertise firepits, but only for certain pitches, while other accommodation types get a BBQ or nothing but a shared kitchen tent. Get the answer in writing for your exact accommodation, not for the site in general.
- Confirm whether cookware, cutlery and crockery are included. Some sites provide a full kit as standard, others rent one for an extra charge, and a few expect you to bring your own. Ask exactly what is in the unit so you know what to pack.
- Check fire-risk rules for your travel dates. If you plan to cook over flame, ask whether open fires are allowed during your stay, since restrictions in dry summer periods are common and can change at short notice. Charcoal and gas BBQs are often still permitted when open wood fires are not, so it pays to know your fallback.
- Weigh up the price of a full kitchen. Sites with private indoor or covered kitchens usually charge about 10-20% more than comparable sites without them. Decide whether cooking in comfort is worth that premium for your trip, or whether a firepit and a good jacket will do.
Once you have clear answers, you can pack the right gear and plan meals that actually suit your setup rather than fighting it on arrival. Write down what the site confirms, because details can differ between unit types and seasons. If you want a broader checklist of things to sort out before departure, the guide to first-time glamping mistakes and how to avoid them covers the other details travelers commonly overlook.
Packing and Meal Planning for Outdoor Cooking
Outdoor cooking rewards simplicity. The setups you find at glamping sites — a firepit, a single BBQ or a two-burner stove — favor meals that need one vessel and little fuss. Complicated recipes with three pans on the go fall apart fast when the light fades or the stove is shared.
Build your meal plan around that reality before you leave home. Choose dishes you can cook in one pot, thread onto skewers or wrap in foil parcels, and write a rough plan for each evening so you are not improvising with a headtorch in your teeth. If you are only away for a couple of nights, the planning tips for weekend glamping trips apply just as much to food as to packing.
A few items earn their place in the car every time:
- A headtorch with fresh batteries, so you can cook, wash up and find the kitchen tent after dark while keeping both hands free.
- Matches or a lighter packed as backup, ideally in a waterproof bag, since damp kindling and dead lighters are a classic evening-ruiner.
- A cool box with plenty of ice packs if your unit has no fridge, plus a separate bag for drinks so you are not opening the food box constantly.
- A sharp knife and a small chopping board, since communal kitchen tents rarely have knives that cut properly.
- Biodegradable soap and a sponge, useful whether you are at a shared sink or washing up at a tap.
- Aluminum foil, zip bags and a few containers — foil parcels cook directly on embers, and containers keep leftovers safe for lunch the next day.
If you are sharing a kitchen tent, do your prep at home. Chop vegetables, marinate meat and portion dry ingredients into bags before you travel. Pre-chopped ingredients cut your stove time dramatically, which matters when other campers want dinner at the same hour. Pre-measured spice portions in small bags also save you hauling a full spice rack for a three-day trip.
Choosing the Right Cooking Setup for Your Trip
So the answer to that pre-trip question — firepit, BBQ or kitchen tent — comes down to three things: your unit type, the season, and how much you actually want to cook. Firepits suit slow, social evenings in the dry months, while BBQs are the safer bet during fire-risk periods. Kitchen tents work well for longer stays and group trips, and full kitchens suit comfort-first travelers who don’t mind paying a bit more for the privilege.
Whichever setup you land on, confirm the details with the site before booking, then pack for that setup rather than for every possibility. Do that, and you’ll arrive knowing exactly where dinner is coming from. If this helped you plan your trip, leave a comment or share the article with a fellow glamping friend.